Ready to explore the features of Nitro? In this getting started guide, we'll show you how to get up and running with Nitro. You have the option to choose between the convenience of the web app or the enhanced capabilities of the desktop version. We'll guide you through the setup process, so you can start enjoying all that Nitro has to offer.
Get ready to unlock the full potential of GraphQL with Nitro. Choose your preferred option and follow the setup instructions to start enjoying the features that Nitro has to offer.
Web App
To begin your exploration, simply visit nitro.chillicream.com and experience the convenience of Nitro's web-based version. This excellent starting point allows you to conveniently probe public GraphQL APIs and access most of the features that Nitro offers. For an even more immersive experience, you can also install the web app as a Progressive Web App (PWA) on your device, providing a native-like experience.
Desktop App
You can install the Nitro App directly from our download page. The download page provides DMG installers for macOS, x64 installers for Windows, and AppImage/Snap installers for Ubuntu and Ubuntu-based Linux distributions. Note that other Linux distributions or installer formats are currently unsupported.
Upon successful installation, follow the steps in the Your first Query guide to execute your first GraphQL query using Nitro.
Your First Query
Lets guide you through the process of creating your first GraphQL query document using Nitro.
Step 1: Start the Nitro application. You should see an interface similar to this:
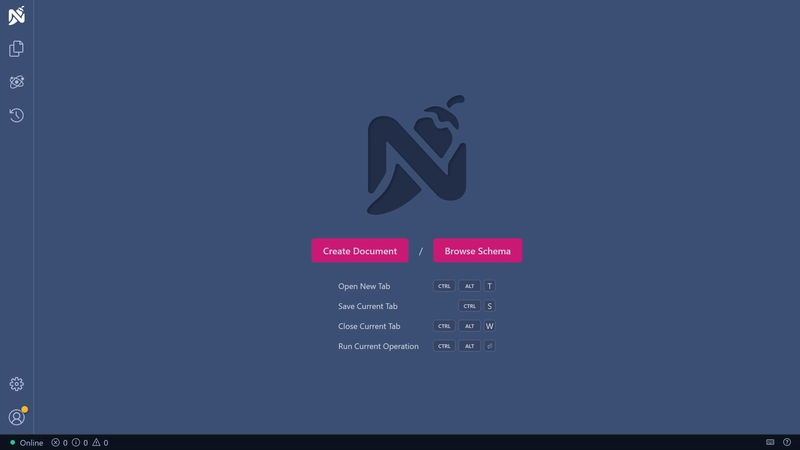
Step 2: Click on the "Create Document" button to initiate the creation of your first query document.
Step 3: You'll see a new document called 'untitled 1' generated. Simultaneously, the connection settings dialog box will pop up automatically.
Now, input the following link into the 'HTTP Endpoint' field: https://workshop.chillicream.com/graphql
It should resemble this:
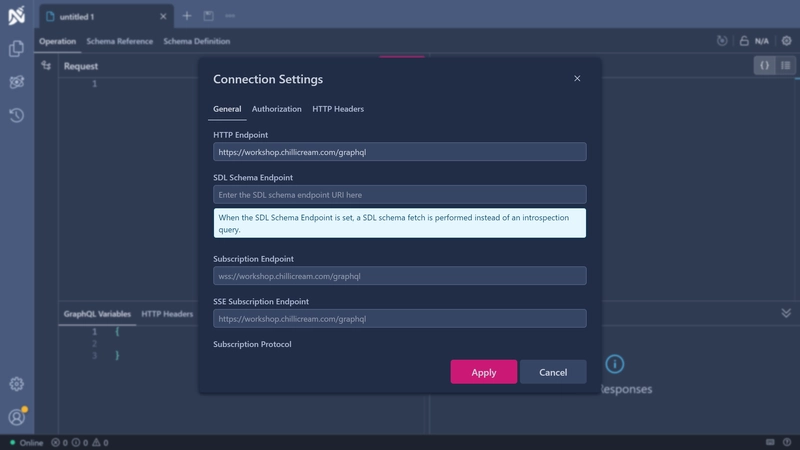
Step 4: Click on the 'Apply' button. This will save your settings and close the dialog box.
Step 5: At this point, your screen should look like this:
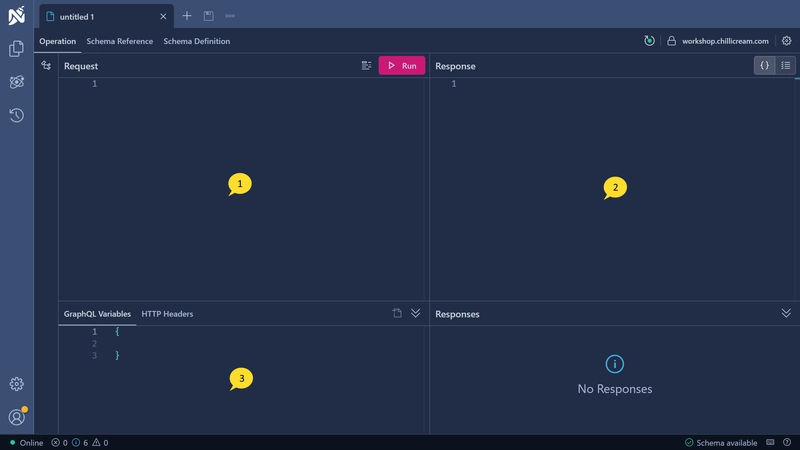
Take note of the following key elements:
- Request Pane: This is where you will input your queries.
- Response Pane: Here, you will see the output or response of your queries.
- Variables Pane: This is where you can define variables for your query.
Step 6: The green circle at the top right next to the schema url indicates that you are connected to the GraphQL server and that your schema is fetched. You now have full intellisense for your queries. Copy the following GraphQL query and paste it into the 'Operations' editor area:
{ sessionById(id: "U2Vzc2lvbgppMQ==") { title track { name } startTime endTime }}
Step 7: Click on the 'Run' button. You should see a response with data in the 'Response' area. Congratulations, you have completed a GraphQL query!
Step 8: Now, let's save your document.
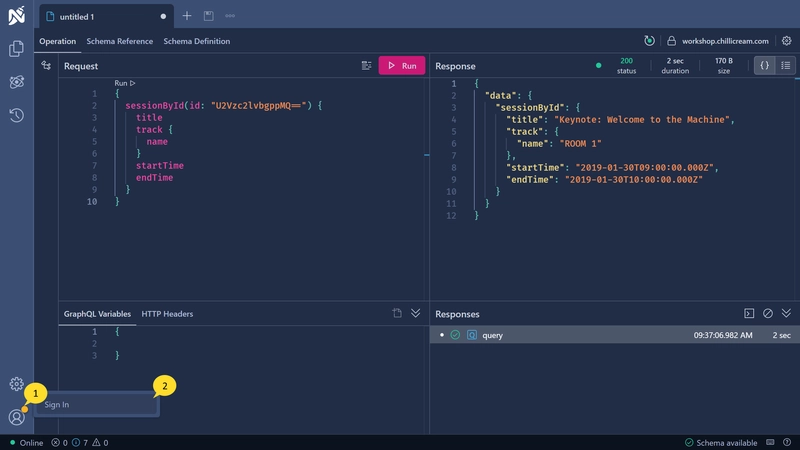 Sign in to your account by clicking the 'Sign In' button on the user icon in the bottom left corner of the screen. If you don't have an account, you can create a new one.
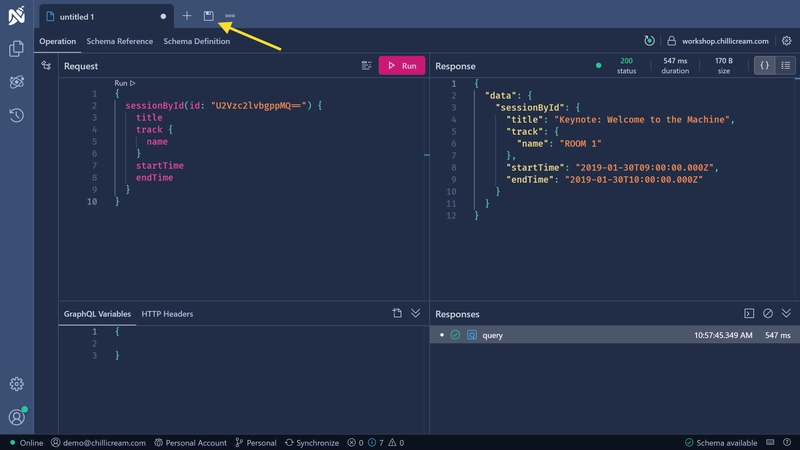
Step 9: Once you are signed in, save your document by clicking the 'Save' button next to the tabs. Your documents are now synced between your devices.
Step 10: Great job! You've successfully created, executed, and saved your first GraphQL query using Nitro. To learn more about the Nitro User Interface, head over to the Explore the UI guide.
Happy querying!
